
Dynamics 365 CRM Automated Solution Deployment using Visual Studio Team Services Online Build & Release
One of the useful features in Dynamics CRM is the ability to create solutions for transporting distinct pieces of work across development environments. Whilst this is useful, it also means that if you have a number of development environments that it can become time consuming making sure each of the development environments contain the correct version of a solution. There is also the possibility of forgetting to install the updated solution at all.
Knowing that the Microsoft had released APIs for importing & exporting solutions, I wondered if there was a way to utilize these and use the Microsoft Visual Studio Team Services (VSTS) build and release functionality to automate the process. Wael Hamze had already had the same idea and created a fantastic set of build tools and released them to the Visual Studio market place. This blog will go through my experience of setting up the functionality.
Scenario
The tasks that the build and release will be expected to do during this blog are: Automatically increase version number of development solution Automatically increase version number of major release solution Export solution from JCExamPrep and import into JCExamPrep2
Installation of Build Tools
As the build tools have been released to the Visual Studio market place the installation is nice and easy. The build tools are called Dynamics 365 Build Tools. The tools have been released free of charge so installation is as simple as clicking ‘Get It Free’ and then accepting the terms and conditions.
CRM Solution
For this example I have created two CRM instances, the development environment is called JCExamPrep and the ‘Live’ environment is JCExamPrep2. In the development environment I have created a solution called ‘Loan Management’, this is set to version 1.0.0.0 and it is a unmanaged solution containing a new entity called ‘Loan Application’.


Variable Groups
One of the requirements I had was to make two build definitions for each environment. One of the build definitions would update the revision number in the version and then transport the solution to the testing environment. The second build definition would update the minor number in the version and transport the solution to Live. To prevent having to update both build definitions every time a new version was released to Live I decided to use variable groups. Variable groups allow VSTS to share variables between multiple definitions, allowing me to update the version number in one place.
To create a new variable group, go to the Build & Release heading in VSTS and select ‘Library’, once in Library click on the ‘+Variable Group’ button. In this example, the variable group is called “Version” and contains 1 variable called ‘Version Number’ with a value of ‘1.1.0’ (the build part will be set in the build definition).

Creating the Build Definition
To create a new build definition, go to VSTS and click on ‘Build & Release’ then go to Builds and click ‘+New Definition’. You will then be prompted for the sources, in this example I have selected ‘This Account’ and left the project, repository & branch as the default options. Once you confirm the options you will then be prompted for the template, select ‘Empty Process’. You will then be able to begin creating the build definition.
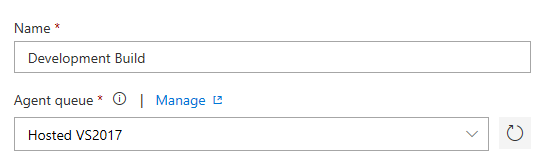
Give the definition an appropriate name, in my case I have gone from “Development Build”.
Variables
The next step is to add the variables for the build process. We will need to add the connection string for the development environment, and we will need to add a link to the variable group that was setup earlier.
To create the connection string variable, ensure you are in the ‘Process Variables’ section and click ‘+ Add’. Provide a name for the variable, in this case I have called it ‘DevConnectionString’. The connection string value should look like:
AuthType=Office365;Username=EmailAddress; Password=Password;Url=InstanceUrl
Variable Group
To link the variable group, go to the Variable Group section on the left hand side of variables and then click ‘Link Variable Group’, you will then be provided with a list of the variable groups that have been created.
Options – Build Number Format
As we want the solution version to be automatically increased, we will need to setup the build number format. This is the name that VSTS will give to the build, but it will also be used by a task to get the revision number.
To set the build number format, go to Options and then set the build number format. The build number format I am using will copy the value from the version variable version group and concatenate it with the revision number from the build.
$(Version Number)$(Rev:.r)
If creating the build definition for a deployment to Live, you can update the build number format to provide x.x.x.0 by changing the build number format to
$(Version Number).0
Tasks
The next step is to create the tasks that will be accomplished during the build. In this example we will be:
- Publishing Customizations
- Exporting the solution
- Publishing artifacts
Publishing Customizations
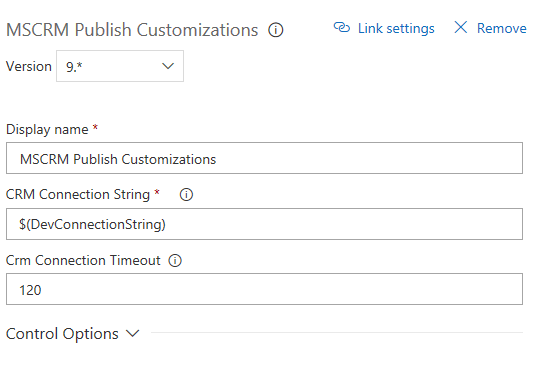
This step will ensure that all customizations are published before the solution is exported. To add this step search for ‘MSCRM Publish Customizations’ and then add it.
The only property that needs to be updated is the connection string. If you have created the variable in the step before, you can enter it as $(DevConnectionString), alternatively, if you have have not created a variable you can put the full connection string in here.
Setting Version Number manually (when publishing to Live)
It is possible to allow the export solution step below to automatically update the revision number of the version, which is what I have used for development purposes.
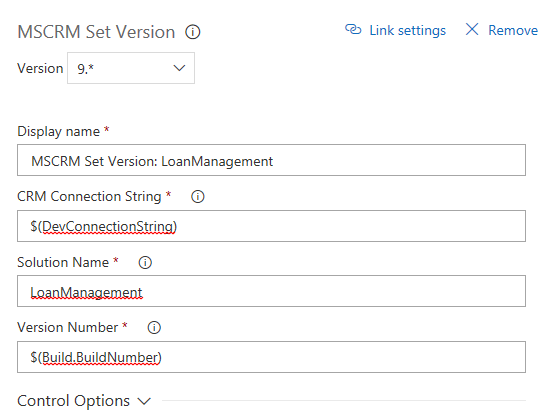
It is also possible to manually set the version number, which is what I do when I create the Live build definition. To manually set the version number, add the ‘MSCRM Set Version’ step to the tasks. If this option is selected, then the ‘Update Version’ in the export solution step should be un-ticked.
A connection string and solution name will need to be provided. The solution name will be the schema name for the solution, not the display name.
The version number can then be set. If you have created the variable group and set the build number format as above, then you can use the build number in the version number. To do this, set the version number to
$(Build.BuildNumber)
Export Solution
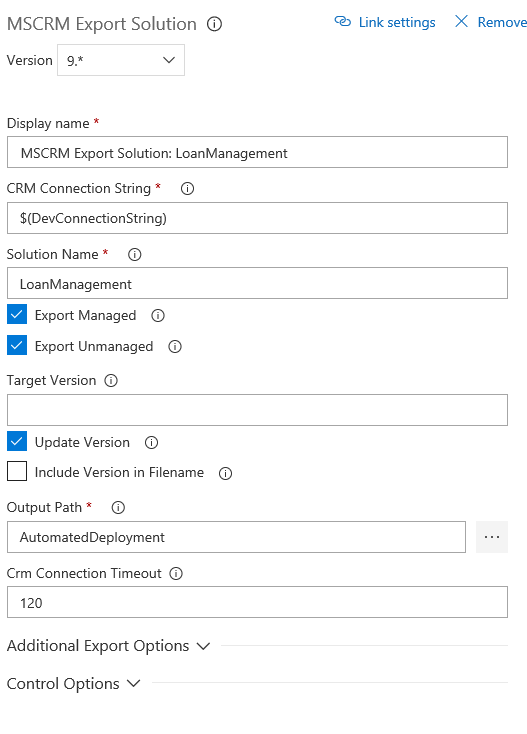
Now that the customizations have been published, the next step is to export the solution. This task is called ‘MSCRM Export Solution’ and requires a little bit more configuration than the previous task.
The connection string will need to be added again. This can be done using the variable, or if no variable has been created you can hard code the connection string in here.
The solution name will need to be added as well. This will be the schema name for the solution rather than the display name.
You get the option to export as managed or unmanaged. In my example I will be doing both as I would like to keep a copy of the unmanaged solution as a backup in case the development environment fails, but I would like to import the solution as managed into my Live environment to prevent customization.
In this build I have also ticked the ‘Update Version’ option. This is because this is the development build and I would like it to increase the revision number automatically for me each time I generate a build. This will take the build number format and use it to determine the revision.
It is possible to add the version number to the file name, but this will cause issues when setting up the release, as the release will be setup to choose a specific file from a specific path and if the file name changes, the release will fail. If you would like to have a copy of the files stored with the version number, I would recommend adding this step again but with ‘Update Version’ and ‘Include Version in File Name’ removed.
Your build artifacts would then consist of the managed and unmanaged solutions with and without the version number in the file name.
The output path is where the files should be stored. In my example I have created a folder to store the files in.
Publish Artifacts
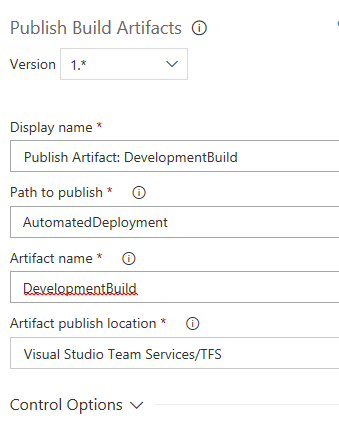
The last step of the build is to publish the build artifacts so that they can be accessed by the release definition. To do this add the ‘Publish Build Artifacts’ task and set up the options.
The path to publish will be the path that has been defined as the output path in the export solution step.
The artifact name should be something meaningful as it will be used later on when creating the release definition. In this example I have named it ‘DevelopmentBuild’.
The final setting is the artifact publish location. I have selected ‘Visual studio Team Services’
Build Summary
We have now created a build definition that will automatically publish customizations for the solution then export the solution and make it available to a release definition.
The next step is click ‘Save & Queue’. This will add the definition to a queue and do an initial build. It is necessary to do the build as without it the release definition cannot see the files to work with.

Release Definition
Now that the build definition has been completed and has ran successfully, the next step is to create the release definition. The release definition is the step that is going to publish the solution into the Live environment.
To create a new release definition, go to Build & Release in VSTS and select Releases. You will then be able to create a new definition. For this example I will be using a blank process template.
Artifacts
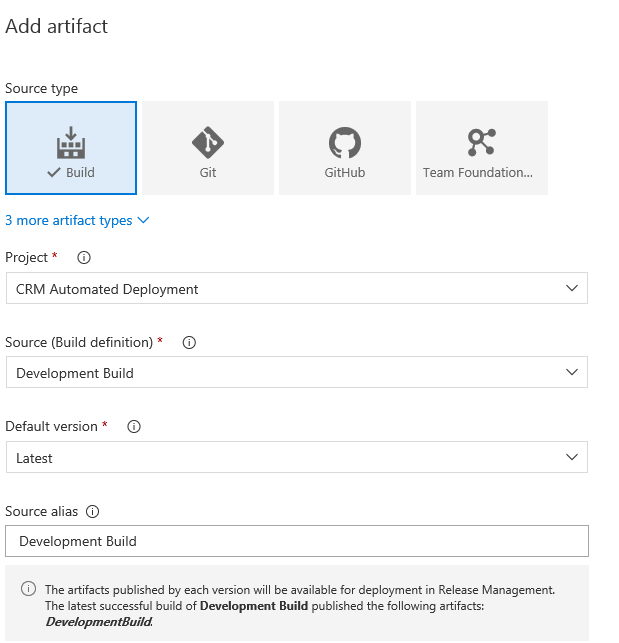
The artifact will be the results of the build. Click on ‘Add’ on the artifacts, then ensure ‘Build’ is selected as the source type. Choose the source (build definition) from the list.
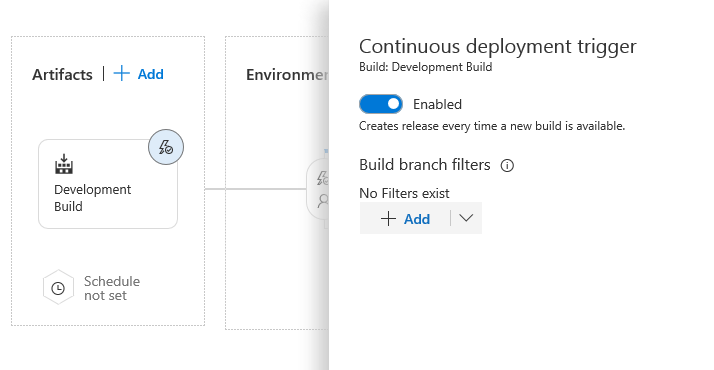
In my situation, I would like the release to happen as soon as the build is complete so I will need to setup the trigger. To do this, click on the lightning bolt next on the build artifact and then toggle the switch that appears. If you do not want to do this, you will need to queue a release once your build has completed.
Environment
Click on the environment to allow the options to be set. The environment release status will be visible from the build & release dashboards, so I would recommend giving the environment a meaningful name. In this example I will name it ‘Live’.
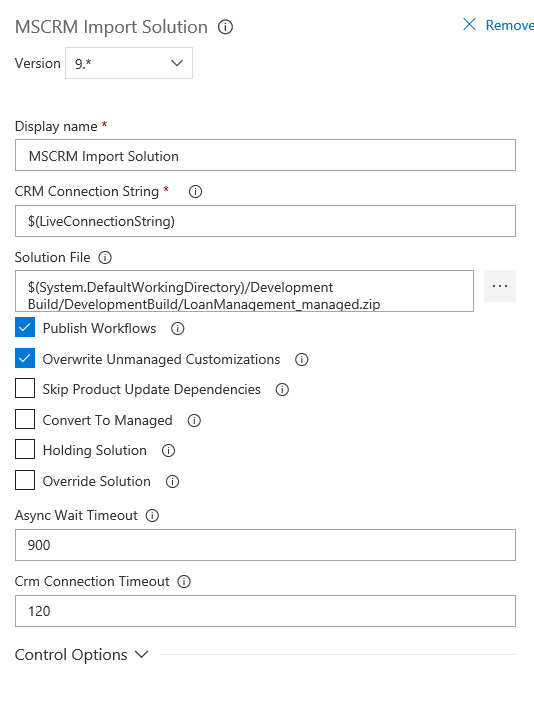
Once you have named the environment, click on tasks to add the release steps. Click on the “+” on Agent Phase to add a new task for ‘MSCRM Import Solution’
The connection string for the Live environment will need to be added. As before, this can either be done by creating a variable or by hard coding the value into the textbox.
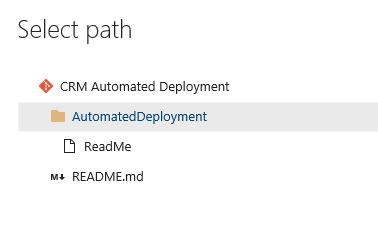
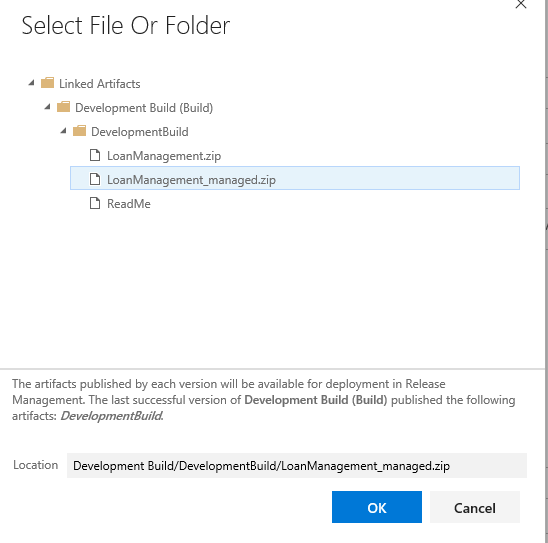
Select the solution file by clicking on the browse button, this will allow you to navigate the structure of the build artifacts to select the appropriate solution. In my example, as I want to import the managed solution into my live environment, I will select LoanManagement_Managed.zip There’s a number of options that are available to select. You should investigate these options and determine whether you want to select them or not. In this example, I want to publish any workflows & overwrite any unmanaged customizations – but this might not always be the best idea, especially in already existing solutions.
Once you are happy with the settings you can save the release definition. If the release trigger has been setup, any new builds will now trigger this release.
Results
Now that the build and release definitions are created, we can schedule a build which will publish the customizations, download the managed and unmanaged solutions and then import the managed solutions into a different environment.

Once the release definition had finished running, the solution was successfully imported into the new environment as a managed solution.

Viewing Historical Solutions
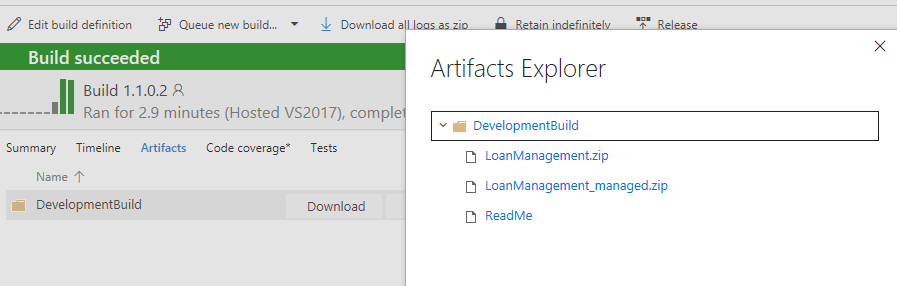
One of the advantages of using the automated deployment is that it will keep a copy of the solutions in the build artifacts. The number of builds to keep can be changed in the retention policy. To view the historical solutions, go to the build history by clicking on the build number
Once the build information has loaded up, you will be able to browse to the artifacts and then click explore. Alternatively, you can download the solution files.
Summary
This blog post will hopefully have helped you setup an automated build & release definition using the Dynamics 365 Build Tools by Wael Hamze. There is still more that could be done around the automated deployment but this should give a good base from which to start.

Leave a comment
Your email address will not be published. Required fields are marked *