Dynamics 365 – Automated HTML Reports with Microsoft Flow
A request that I recently got from a customer was to send a weekly report showing all of the Opportunities that had gone 180 days past the estimated close date and that were still open. The report should be sent as an e-mail and sent to a specific person who can then chase up the owners of the Opportunities.
Microsoft Flow
In the past, this would have required quite a bit of work to get the scheduling to work and to create the HTML for the e-mail. Now, thanks to Microsoft Flow this is a nice and easy task.
Flow comes with a set of connectors out of the box which can connect directly to Dynamics 365. The only real potentially hard part is the OData filters, however, it’s easy to create the ODate query using FetchXML Builder inside the XrmToolbox
Starting the Flow
Flow needs something to trigger it to run. As this is going to be a weekly e-mail, I have selected the scheduler trigger which allows the time frame to be entered. Other triggers do exist and can include record creation/updates in Dynamics.

Querying for Old Opportunities
Once the Flow has started, the first step is to query Dynamics for all open Opportunities that are 180 days past their estimated close date. This can be done using the ‘Get Records’ action for Dynamics 365 and passing in the OData filter. As mentioned before, if you are not comfortable with OData then the XrmToolbox allows you to create a FetchXML query and then view the OData for that query.
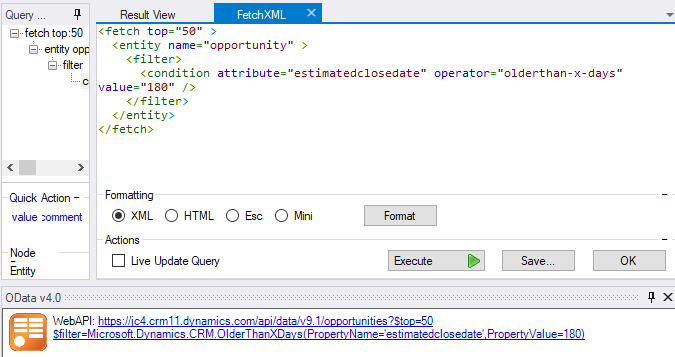
Using the FetchXML Builder gives the full WebAPI for the query. Inside the Get Records connector we just need to take the bit are Filter= and enter this into the Filter Query box.
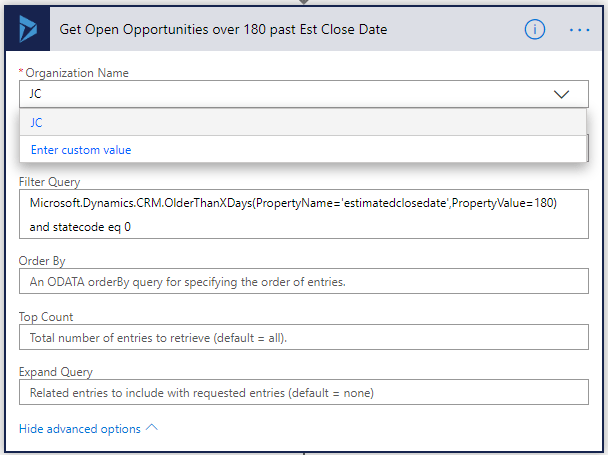
At this point, we can also pass in other parameters such as the Expand query. This would allow information from related entities to come through. I will be using the Owner full name field, however, the Expand functionality doesn’t seem to work on this field – I believe this is because the Owner could be either a Team or a User so the Expand doesn’t know which entity to expand. There may be other workarounds regarding parsing the JSON, but for this example, I will perform a lookup later on in the Flow to get the Owners name.
Starting the Table
The output of this Flow is going to be a simple HTML Table which contains a row for each Opportunity found. Starting the table is as simple as initializing a new variable of type String and setting the value to be the beginning fo an HTML table & the headers.
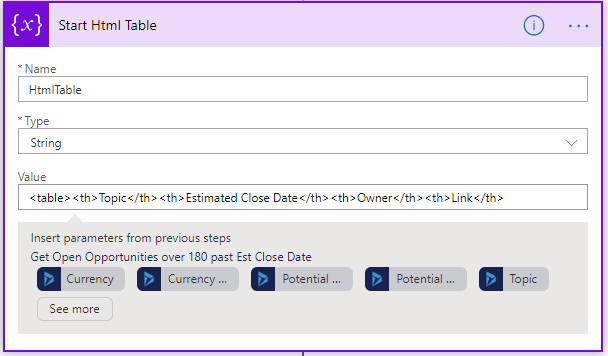
Building the rows
Now that the table has been defined, we next need to loop through the items. This is done by using the ‘Apply to Each’ action. In this example, as we’re querying the Owner field which can be a User or a Team, we need to do a conditional step to find out which entity to query.
If the Owner Type is System User then the next steps will query the Users records, otherwise, the Teams records will be queried. After finding the name the table string variable created before will be updated to include a new row.
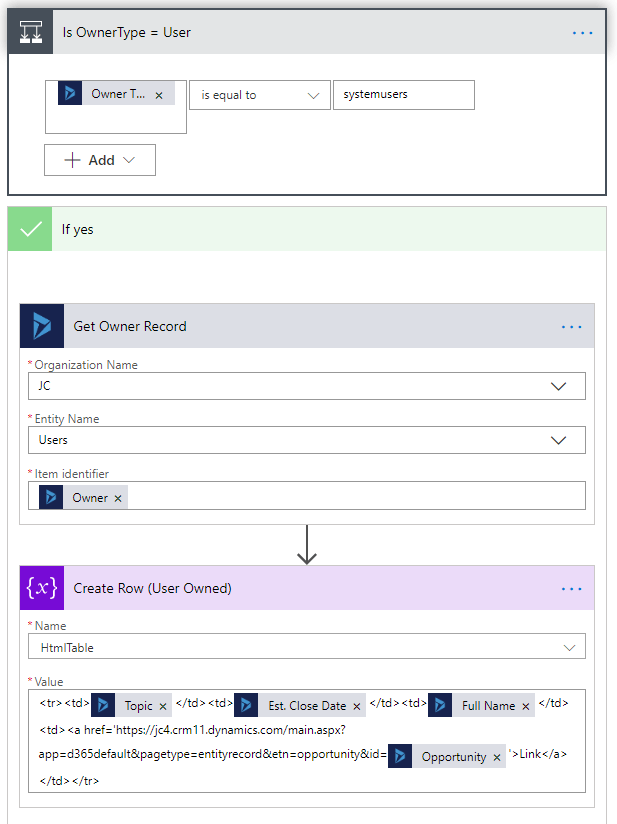
Closing the Table and Sending the Email
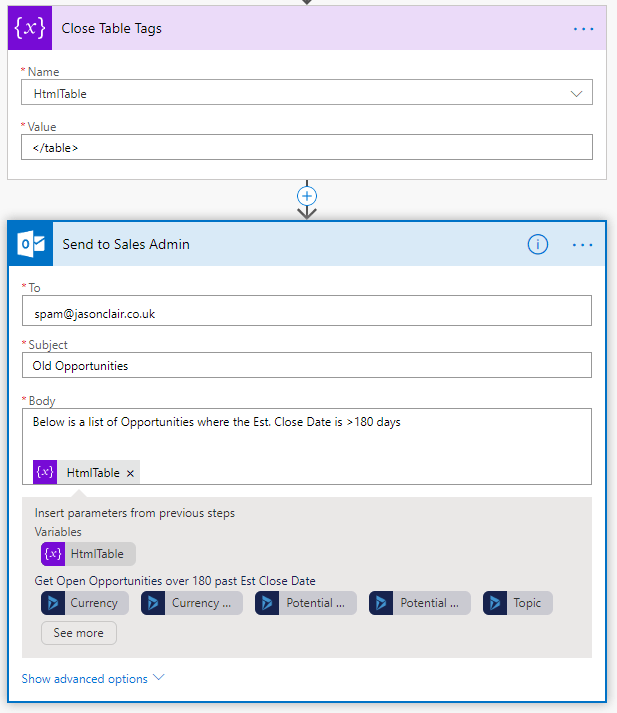
Once the loop has finished the final tasks are to close the table, which is done by just appending the closing tag to the string variable and then sending the e-mail.
In this example, I am using the Outlook Send E-mail action. Adding the table string variable to the body will put the HTML into the e-mail message.
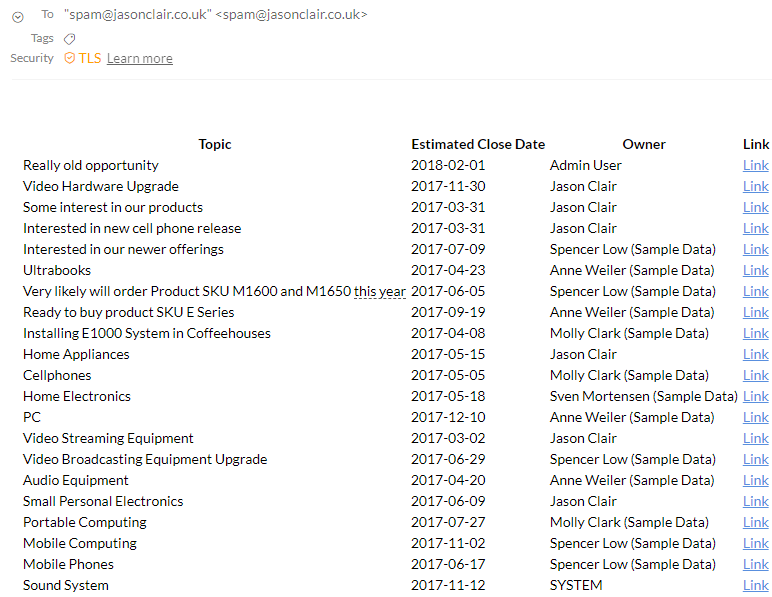
The e-mail that is then sent looks like the below. With a bit more effort on the styling, this could be turned into a nice looking weekly report.



Leave a comment
Your email address will not be published. Required fields are marked *