SharePoint Calendar Colour Coded Entries (using Calendar Overlays)
One of the features that I’ve found users like most about the SharePoint calendar is the ability to colour code entries. In some cases users have coloured the calendar dependent on who the appointment is for, in others, they have coloured based on the type of appointment, this blog post will show the latter scenario. For this example, I will be using the out of the box calendar functionality and choosing the colour based on the category using calendar overlays.
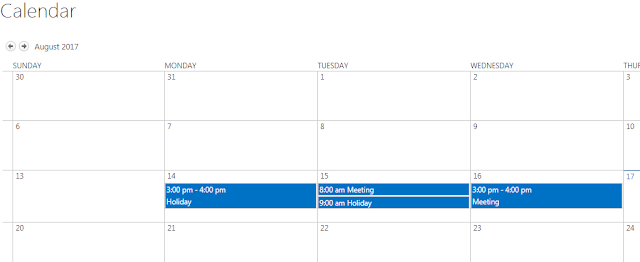
Views
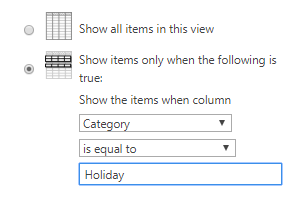
A view must be selected when creating the overlays. The views are normal calendar views with the filters set however is required, in this example, any entries that are categorized as ‘Holiday’ will be coloured red, this means a view showing just Holidays is required.
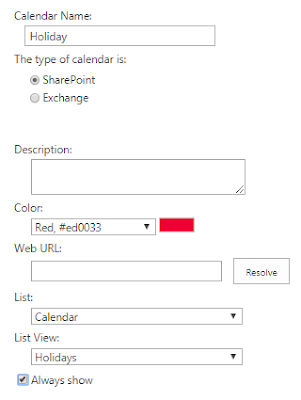
Overlay
From the calendar that you would like to add an overlay too, click on the Calendar ribbon and select ‘Calendar Overlays’. The next step is to click ‘New Calendar’, a page like below will be created. There is a limited choice of colours and a limitation of 10 overlays per calendar.
The Web URL should be filled in automatically but if not this should be the URL where the calendar is located. Clicking on resolve will then fill in the List and List View.
Final Steps
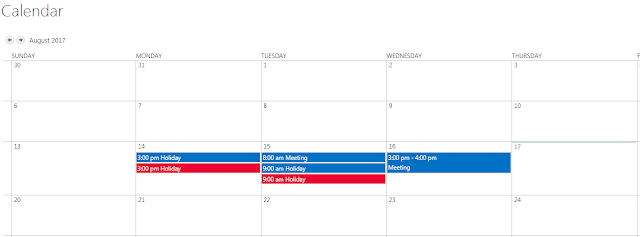
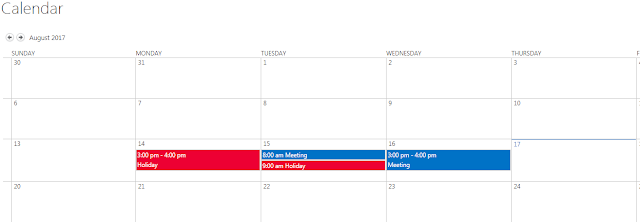
The calendar will now show red items for Holidays, but they will also be shown by default in the normal view. This means that you may want to change the default view to ignore holidays (and any other overlays that have been added).
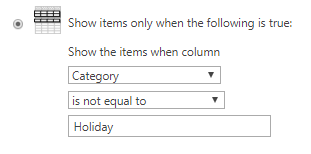
With the default view updated the calendar now shows one entry for a holiday.



Leave a comment
Your email address will not be published. Required fields are marked *